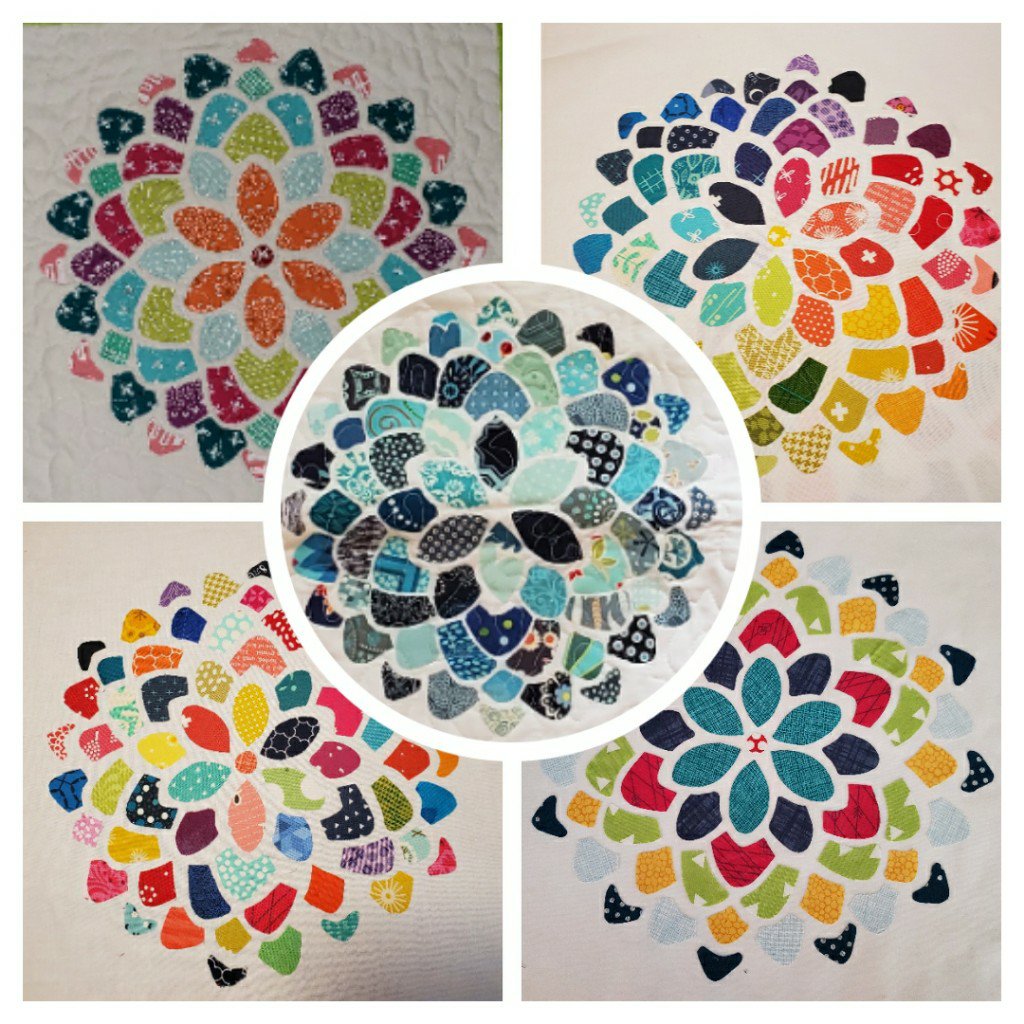
This mum is such a fun block to make so I thought you might like to make it, too! And it’s a good way to make a dent in your scraps.

You’ll need some EZ Steam II or equivalent, a sharpie, some small sharp scissors, a backing fabric, scraps, and this template
. Don’t print it yet! Keep reading below.

You will want to decide what size you want your finished mum before printing. This one I printed at 70%.and it measures 9.5 inches .

This one at 85% measures 11.5 inches.

And honestly, I’m not sure what percentage I used for this but you can play around and go as large or small as you want.

Once you decide what size, print out your template. If you can, print on cardstock so they have a little more weight and are easier to trace around. If you plan to do multiple blocks, say for a quilt, I would suggest getting stencil mylar or template plastic to make tracing much easier.

I like to letter my pieces on this full mum printout and then I cut out one of each piece and label it. As well as write how many I need of each piece.

The next step is to trace your pieces on your fusible. Be sure to use the grid side to trace. I forgot and it was a little bit of a pain. However, if you mess up like I did, put the traced side down and use something firm press all over to kind of make the fusible stick to the traced side and be careful when peeling.
They don’t need to be perfectly smooth as the scissors will help with that when you’re cutting them out. I like to fit them as closely as I can so I don’t waste any.

Cut pieces out, peel the unmarked side, and press on to the wrong side of the desired fabric scraps.

You can make each piece the same color or use random scraps. The top left and bottom right keep the pieces the same colors. The top right and bottom left, I used random scraps but in the top right, I followed kind of a color wheel. And the center is random except sticking to one color.

Now, take your time and carefully cut out your pieces.

Before peeling and sticking, arrange all your pieces on your background and make sure you like the placement and spacing.

And then peel and stick.

When they are all adhered in place, press carefully with a hot iron, placing the iron on top and then picking it up and moving it. Do not iron back and forth or you may mess up your edges.
Now, finish as desired! You can stitch around each piece or you can free motion quilt and make sure you catch most of your piece. Think about how often it will be washed. The more washing, the more chance of fraying so you’d want to be sure your edges are all stitched.
On this quilt, I free motion quilted a meandering pattern over all the petals making sure to catch all my edges in the quilting. It has been washed a lot and the pieces have held up really well.

I did the same with this mini quilt.

I started to stitch around each petal on this mini but honestly, I hate it. I got bored of it and ended up free motioning all over. I also added mini log cabins as a border. I think I may do a medallion quilt like this. 🤔

I’m thinking of making another mini with log cabins for this one.

And maybe pillow covers with these two with some sort of border. I love the color wheel mum!


If you make one, I’d love to see it! Use #fourrobbinsscrapbuster
Enjoy!

Shop related products:


